
These DIY Colored Beads Are Going to Knock Your Montessori Socks Off
Something very strange happens, though, when you make your own materials as opposed to buying them new.
You become oddly attached. You are much more likely to handle them with care, and you are more likely to use them with your children. The experience feels more authentic, linking the past with the present. You can close your eyes and envision Mara Montessori gently feeling her rosary beads and thinking, "Now could I use these as math manipulatives?"
It's the same. You, not Maria, are the guide today. DIY Montessori is not just a way to make materials more affordable. It is a process which deepens the teacher's own understanding of the lessons, a path worth pursuing for its own sake.
Making The Beads
Here's what you need:
Pony beads (single packs of 10 colors each or one big multi-pack)
A roll of speaker wire
Scissors
Pliers (optional)
The Montessori colors are as follows:
1 = Red
2 = Green
3 = Pink
4 = Yellow
5 = Light Blue
6 = Light Purple
7 = White
8 = Brown
9 = Dark Blue
10 = Golden
If you are teaching in a Montessori classroom, I do recommend that you follow this color scheme because your materials to be consistent with the entire Montessori curriculum. If you are making the beads at home, the color choices are completely up to you - just make sure you are always consistent yourself.

Steps
Take the speaker wire and split the two ends in half. Pull a long single strand apart and snip it off with the scissors.
Make a knot in one end.
String on your beads.
Make another knot. Slide the loose knot down so that the beads stay rather tight.
Use your hands (or the pliers if necessary) to pull the knots tight.
Repeat for as many beads bars as you like on the same strand of wire. (I'd make about 20 of each.)
With your scissors, snip between each bead bar. Wasn't that easy?

Storage
Are you wondering where you're going to store these lovelies? Maria Montessori tells us a little story of how she herself kept the beads inside a single container, all mixed up. She eventually left the classroom to teach other educators in her methods. One day, she was visiting a favorite teacher, and to her surprise, the bead bars were inside a compartmentalized box! The teacher was embarrassed, for she had sewn pieces of cardboard together, and she was ashamed of her poor workmanship to contain the beautiful materials. She went on to explain how the children seemed to love the organization that the box provided. Maria was ecstatic, and today the beads in Montessori classrooms are contained in wooden, compartmentalized boxes.
Luckily for us, many DIY options exist at local craft and hardware stores that will fit the bill.
There's no need for us to sew our own unless we really want to. Long ago, I bought this plastic box at a craft store, and it has served my beads well for many years! The children do seem to enjoy the ease with which they are able to quickly select their beads.
I added number stickers to the box one year because so many of my children needed practice with number recognition. It's no longer pretty, and it's survived several moves from classroom to classroom and house to house, but it's where we keep ours today in our Montessori homeschool classroom. I personally think that they are more beautiful in a basket, but having them in order is a relief to the children. The next time I'm in another craft or hardware store, I'll be keeping my eyes out for a new box.
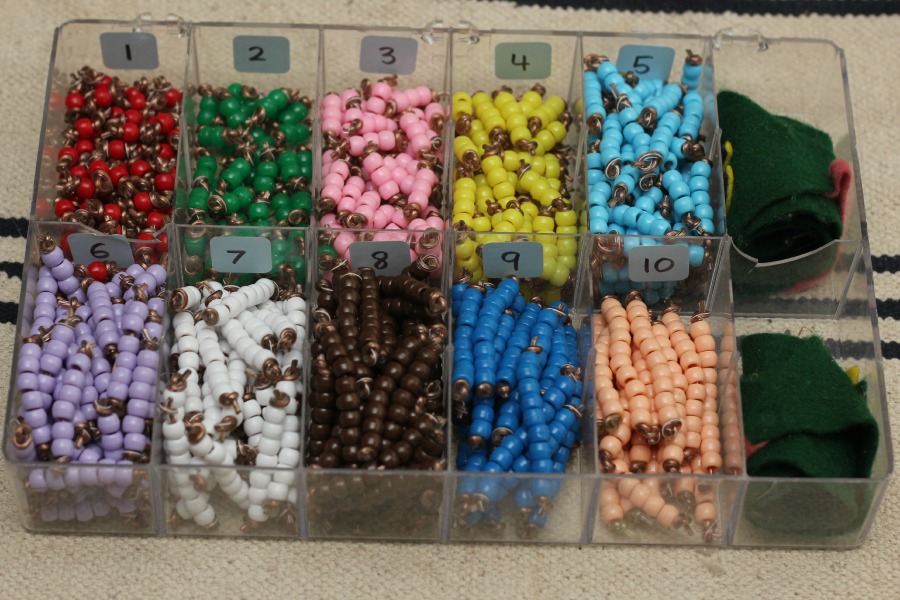
One last thing... You may notice that my 10 bars (golden beads) are also in the container! I like to keep some there for easy access. At the time that I made these beads, I could not find affordable golden pony beads! I chose the next-best color available, which ended up peach. They work just fine. In fact, my entire set of golden beads are peach! If you are in the same situation, I think a light cream color would be a nice option as well.